Once the remote Apache Hadoop repository has been cloned locally, now it's time to use a GUI to walk through the development history of the trunk and the different branches/tags. Gitk (which comes with the installation of Git), EGit (Eclipse Plugin for Git) and QGit are some of the UIs for Git. QGit is more intuitive than others. We will go through the steps for installing, configuring and using QGit.
Installing QGit
QGit doesn't come with the default installation of Ubuntu and can be installed from the command line or using 'Synaptic Package Manager'. Root permissions are required to install QGit.
sudo apt-get install qgit
will install QGit. QGit can be started from the menu (Applications -> Programming -> qgit) or using 'qgit' command from the command line.
Configuring and using QGit
Checkout the branch for which the history has to be viewed in QGit using the 'git checkout <branch>' command. The output of the 'git branch' command shows the selected branch with a *.
To view the Git repository in QGit
- Start QGit from the menu or command line.
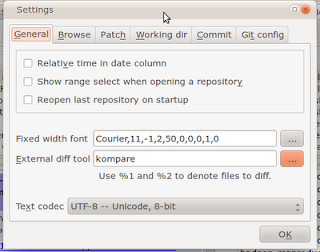
- Goto 'Edit -> Setting' and unselect the 'Show range select when opening a repository' and 'Reopen last repository on startup' options.
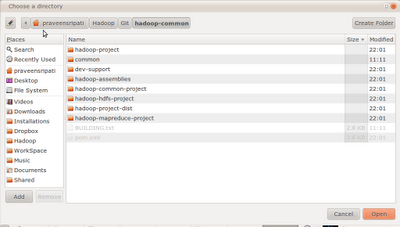
- Select 'File -> Open .....' and select the hadoop-common folder which was created with 'git clone git://git.apache.org/hadoop-common.git' command.
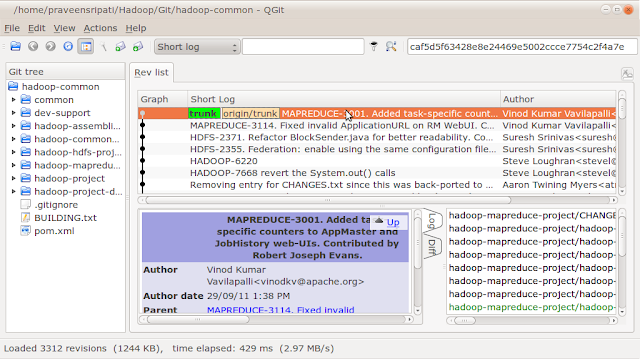
- Select 'View -> Toggle tree view' to show the 'Git tree' on the left side. The 'Git tree' pane on the left shows you the state of the tree at the commit that has been selected in the 'Rev list' pane.
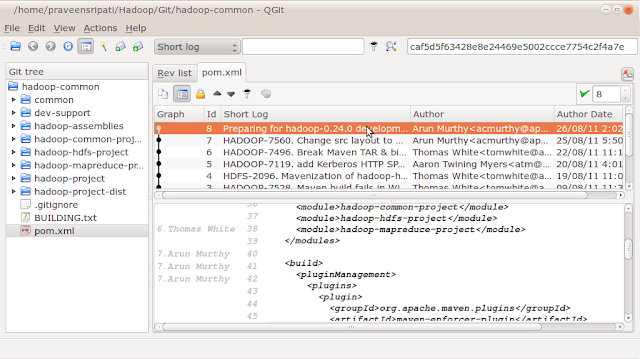
- Navigate to a file in that tree and double click on it to see the content of the file at that version and an indication of who most recently changed each line before that version.
This covers the basics for viewing the development history of a specific branch in QGit.
Happy Gitting :)
Installing QGit
QGit doesn't come with the default installation of Ubuntu and can be installed from the command line or using 'Synaptic Package Manager'. Root permissions are required to install QGit.
sudo apt-get install qgit
will install QGit. QGit can be started from the menu (Applications -> Programming -> qgit) or using 'qgit' command from the command line.
Configuring and using QGit
Checkout the branch for which the history has to be viewed in QGit using the 'git checkout <branch>' command. The output of the 'git branch' command shows the selected branch with a *.
To view the Git repository in QGit
- Start QGit from the menu or command line.
- Goto 'Edit -> Setting' and unselect the 'Show range select when opening a repository' and 'Reopen last repository on startup' options.

- Select 'File -> Open .....' and select the hadoop-common folder which was created with 'git clone git://git.apache.org/hadoop-common.git' command.

- Select 'View -> Toggle tree view' to show the 'Git tree' on the left side. The 'Git tree' pane on the left shows you the state of the tree at the commit that has been selected in the 'Rev list' pane.

- Navigate to a file in that tree and double click on it to see the content of the file at that version and an indication of who most recently changed each line before that version.

This covers the basics for viewing the development history of a specific branch in QGit.
Happy Gitting :)
No comments:
Post a Comment